
Okay so let's see...where to start. We began with painting the walls of course. I picked out several colors as we all know i'm not decisive or simple enough to just choose one :) I had originally decided to do a "tiffany like color wall for behind where her crib would go, 2 light gray walls on the sides, and an entire chalkboard wall on another large wall. I have loved this nursery (link) I saw since way before I was pregnant and that is when I decided baby #2 had to have a chalkboard wall. After we were well into our painting we had decided to paint her closet pink, and then onto that added the lil entry wall into being pink as well, and then added an entire wall to being pink. Wes wasn't fond of the idea of and entire "black" chalkboard wall so we compromised. I told him he could paint that wall pink if I could make a "designed shaped" chalkboard (which was a tough one..but turned out pretty cute I think ) Much more "girly" than a plain square chalkboard that would have looked too much like a classroom to me. We had to let bubba get a few swipes in on sissy's wall as well, after all he is the big brother :) I'm sure it won't be the last marks he or she make on the walls anyhow!


So everytime we tell people that her floors are "paper bag" we have to explain...which is difficult...but i'll try to help your imagination a lil bit as well as share this link that shows a tutorial full of photos of how it's done.

This is a picture (above) of Wes and I all covered in glue and stain working on her floors. Picture to the right is of the floors after we had put the paper down and stained it (prior to sealing it with polyurethane), not yet to it's fullest potential.
Basically you tear Kraft paper into LOTS of randomly shaped/sized pieces (equivalent to brown paper bags) that you can find a huge roll of at your home improvement store in the paint section for around $10. Take those pieces and wad/krinkle them all up into balls. Dip your wadded up paper pieces into a glue/water mixture (just regular elmers glue---you can get a huge bottle of it). Kinda like paper mache when mixed w/the water. Then ring your piece of paper out to get most of excess glue off and unwrinkle the paper, spread the paper onto the floor and repeat until the floor is covered. You can leave it as the tan color of the paper, stain it to a color of choice as you go, or roll you stain on all at once after all the paper has been laid (i've seen several different methods used on the tutorials i've read). Once your stain has dried you will go over the floor with several coats of Polyurethane to seal the floor and give it that shiny/glossy look :) And walah you're done! So a roll of kraft paper, large bottle of elmer's glue, stain (optional), and polyurethane and you got a fabulous new floor for around $60 or less.


To the right and below are some photos of the floor I have from after the polyurethane coat. We absolutely LOVE her floors and the hours of work I put into it were completely worth it!
Now that her walls are painted and her floors are finished let me share with you the painting I and my friends along with my mother painted for Shaelyn's room. For one of my shower's my friend Aimee through a "Canvas painting party". We all knew that she would be taken care of as far as clothes and other items she needed, and it was important to me that her room be special and incorporate several "special items" created by me, my friends, as well as sentimental items passed down from generations.


.jpg)
Here (right) are all the paintings we painted (except for the largest one that I couldn't resist purchasing from Hobby Lobby). If you would like to see all the canvas' up close and you are a friend on the good 'ole facey-book then you know where to find em :)
Okey Dokey...now onto furniture :) Shae has a rather small closet and I knew she would need some extra storage for all her pretty and ruffly wardrobe. So a friend of mine gave us her son's used dresser/changing table (cherry color) and we were so thankful for that wonderful gift. I chose to paint it in the Cool Jazz (light blue) color and add new crystal pink hardware to give it that shabby chic look we are going for. Here is a photo of the finished Changing table/dresser.

Yes I know it's b-e-a-utiful :)
 Next I'll share with you the crib that was a pass down from my son (photo to the left). I have been dying to paint the crib a bright color to stand out nicely on the blue wall....so here is the finished product below!

 Next I'll share with you another pass me down from generations that is very special and I am just so happy that it can be in Shaelyn's room. A chest of drawers that was my mom's when she was a little girl and then was also in my room when i was a baby all the way up until I moved out.
It was previous an off-white with gold painted trim and gold handles.

Items in her room that I sewed....I had originally planned to sew her entire bedding set...however with little time left and how busy I was ended up just sewing her quilt and crib skirt. For her rag quilt i purchased fabrics from Joanne's fabrics in Nashville (as well as buying enough for curtains and other bedding as well). I have made a couple other rag quilts previously and was confident I could make a super cute one for her room. Here is the tutorial that I reference every time I make one. I was very happy with how hers turned out.

This is the ruffle crib skirt i made to match:Not a great picture I know (cell phone pic).

I used this tutorial to reference when sewing the crib skirt... The crib bumper was a gift purchased from babies r us that turned out to match perfectly with the quilt and her other room decor. It came from Heidi Klum's Boho Harmony collection at Babies R Us.

Here are the ruffle curtains I made for her window and the curtain I made to put in place of the closet door. No links for these...as i just made these out of my own trial and error.

So since this post is getting pretty lengthy and this very pregnant worn out mommy is getting pretty sleepy, I'm just going to add the photos of taken of the room all put together and complete now. I will point out items worth mentioning and other details as I go along. So sit tight and enjoy :)


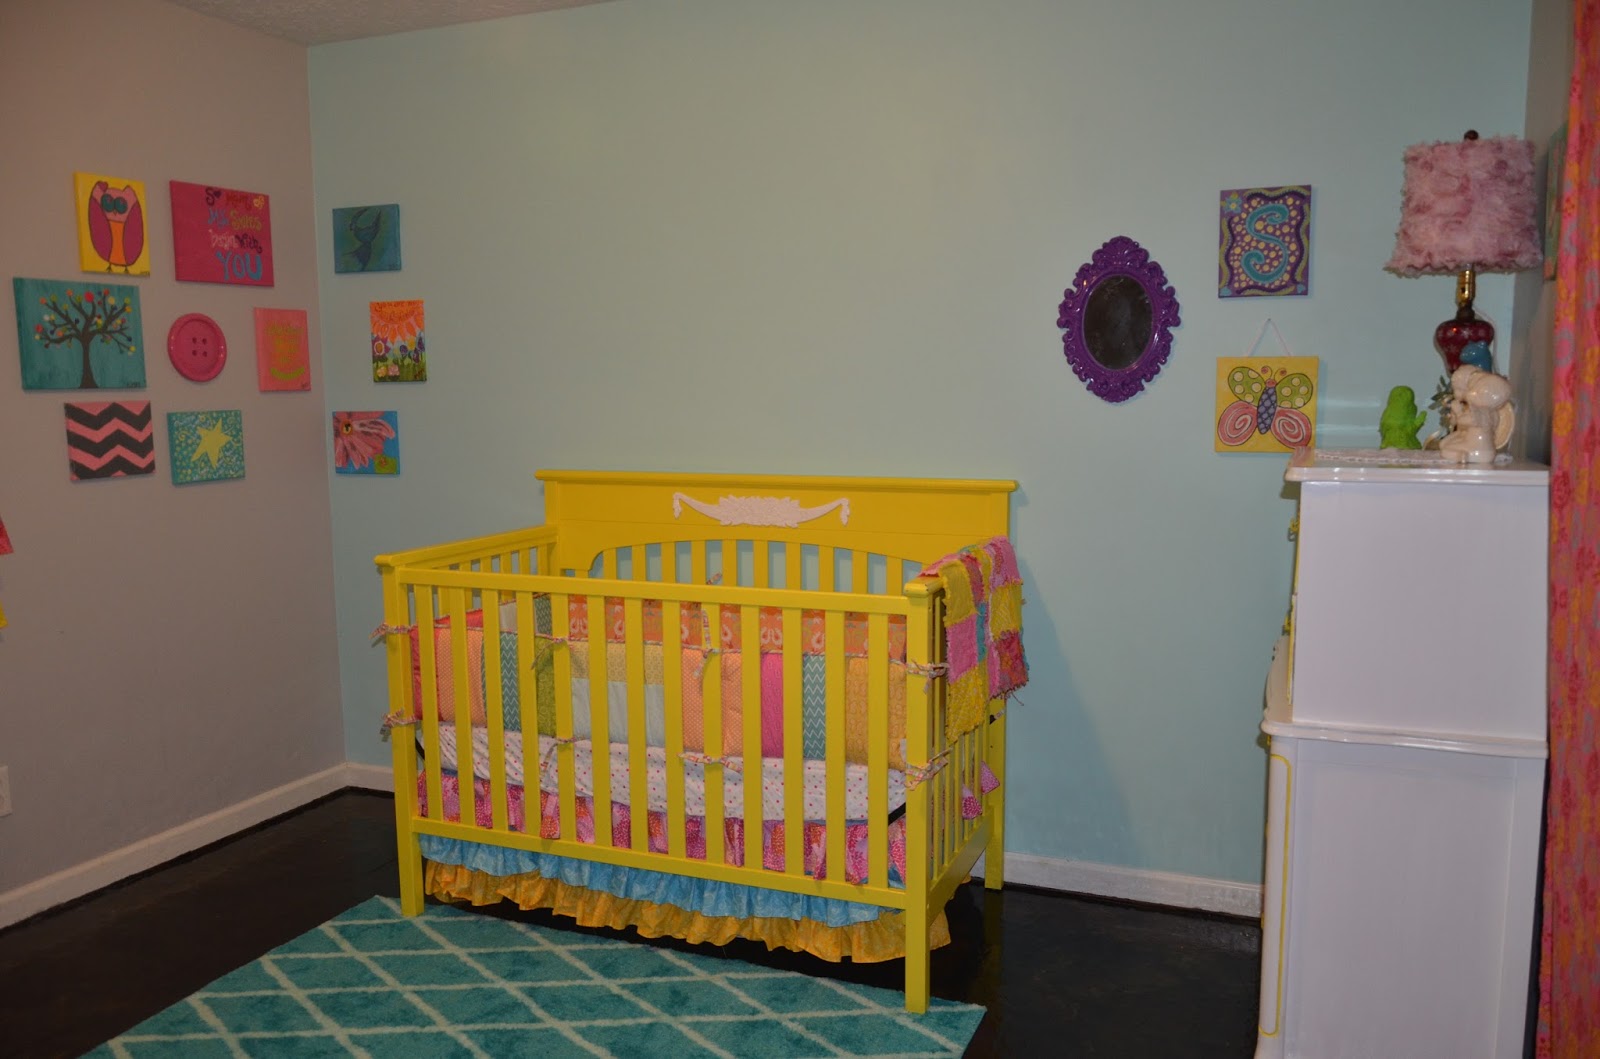


 These photos show a little better view of my quilt and bed skirt :)
The lamp (below) is extremely special to me as it was Shaelyn's great-great grandmother's lamp (my meme for those who had the privileged of knowing her) and probably the person I take after loving to sew and create things from. I had the hubby rewire it to make it updated and safe and I recovered the original shade with some pretty awesome rosette fabric :)


To the right above is our version of the chalkboard wall where I plan to take monthly pictures of Shaelyn as she gets older to track her growth and changes :)
 |
| These Angels I received from the passing of (in order left to right) my meme, my graney, and my Paw. All of which are watching down over my babies and keeping them safe and smiling. These are all the photos I will be posting on the blog, for more up close pictures and detail go to my facebook page and view my album Shaelyn's nursery {in progress}. If you would like to view the board I pinned inspiration to for her nursery check out this link. Thanks for your interest in viewing our little girl's room, it has turned out to be so much better than I could have imagined and I can't wait to have her here with us enjoying it. I am so glad there are so many items that she can cherish and that her room can grow with her as she gets older. Much Love, Zay & Shae's Mommy :) |